 PoppyDisk User Guide
Read the Disk Map
Turn a finished Scan into an understanding of where the bytes went.
When you finish, you can name the biggest folders on the Drive and reach any one of them.
Prerequisites
Before you start
A finished Scan. See Scan a Drive or Scan a folder and keep it pinned.
How to read the rings
The Disk Map is the result view PoppyDisk opens by default. The scanned location sits in the centre with its name and total Size on Disk. Each ring outward is one level deeper in the folder hierarchy, and the width of each Segment is that item's share of the space. The biggest folder is the widest arc on the innermost ring; its own biggest folder is the widest arc in the next ring out, and so on.
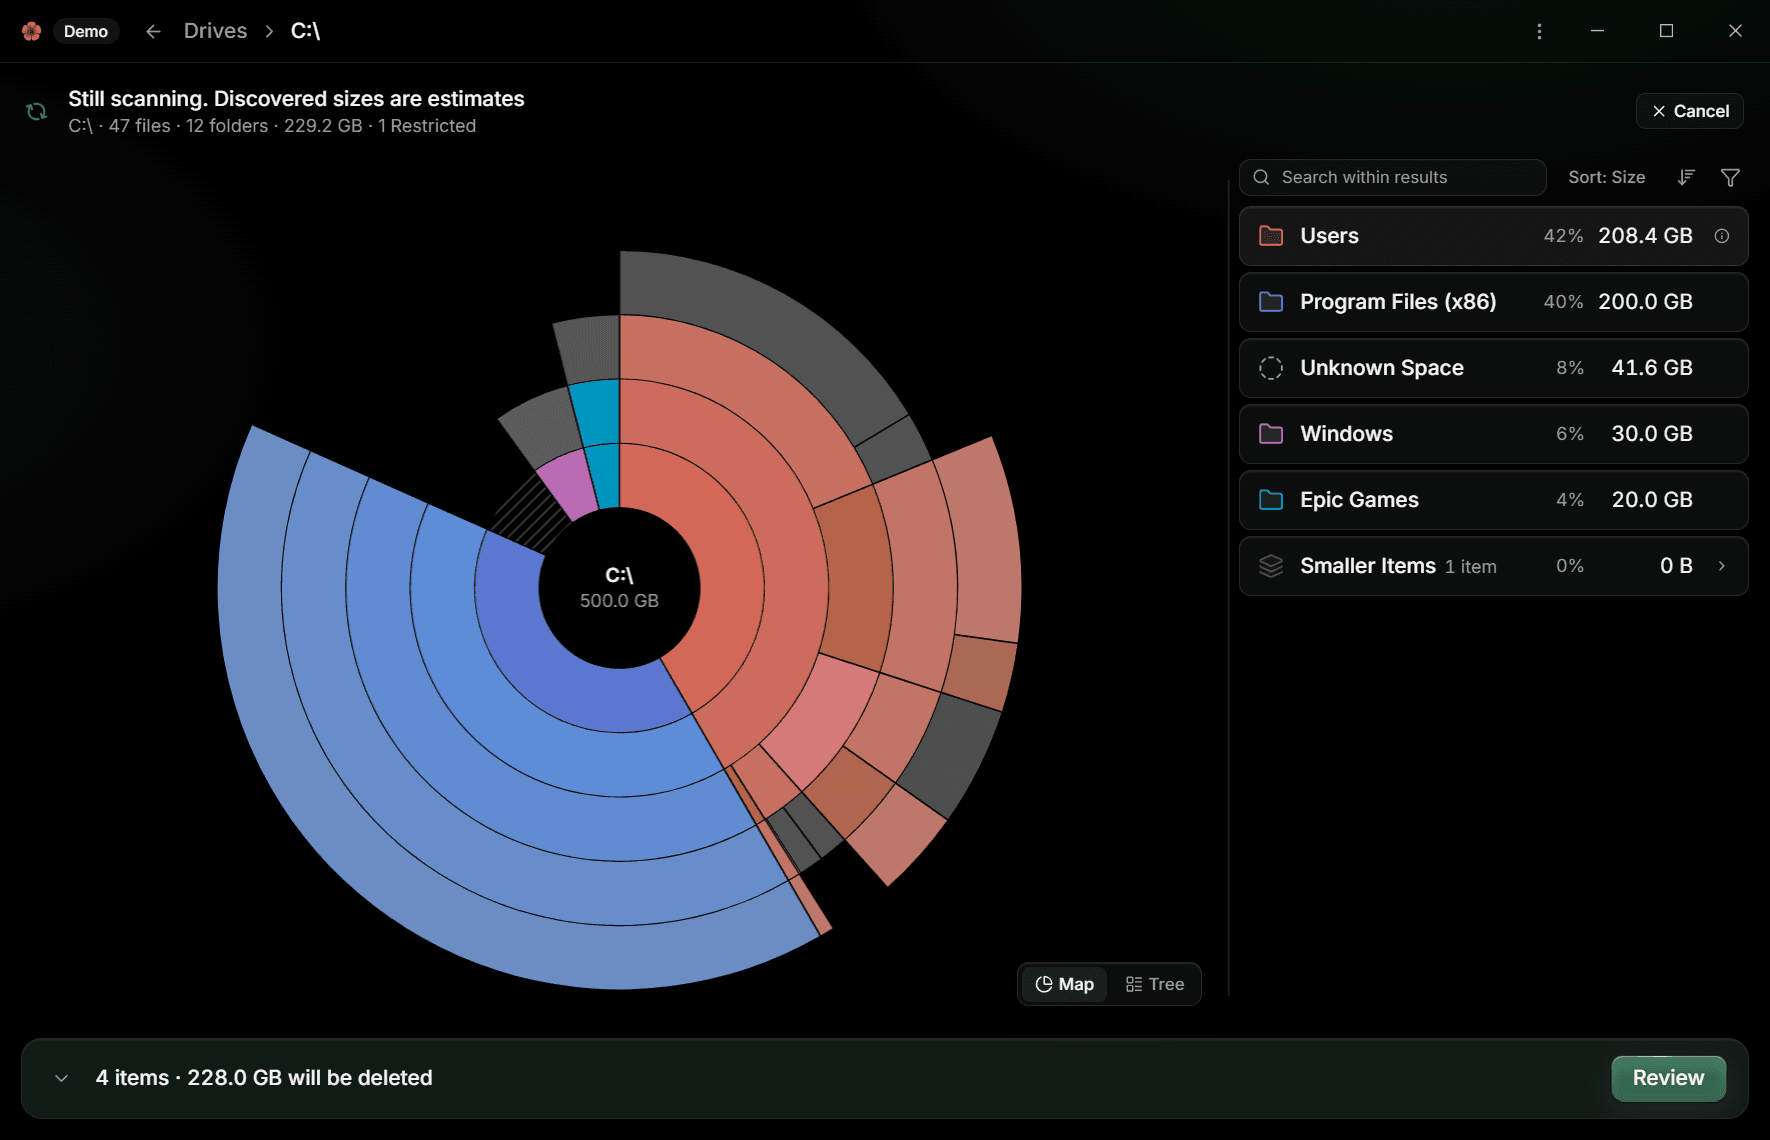
Some Segments look different on purpose:
- Unknown Space is hatched. It is used space on the Drive that the Scan could not attribute to any folder.
- Restricted items are purple. Windows kept them private from the Scan, so their size is unknown.
- Smaller Items is a translucent Segment standing in for the neighbours too small to draw individually.
Every number is Size on Disk. What the sizes mean explains each of these states and why the total can differ from what File Explorer shows.
The Details Panel
The column beside the map lists the children of the folder in focus, largest first: name, share, and Size on Disk, with a badge when something about the item matters, such as Cloud-only. Hovering a Segment highlights its row, and hovering a row highlights its Segment, so you can move between the picture and the list without losing your place.
- Choose a folder row to Drill into it.
- Choose a file row, or the info button on any row, to open the Inspector. See Inspect one item.
- Choose Smaller Items to expand the group into its concrete items.
- Right-click a row, or press Ctrl+B with a row selected, to add it to the Cleanup Basket. See Collect items in the Cleanup Basket.
Drag the edge between the map and the panel to change the panel's width, or focus the handle and use the arrow keys. PoppyDisk remembers the width you chose.
Drill in and out
- Choose a folder's Segment on the map, or its row in the Details Panel. The map animates so that folder becomes the centre, its children fill the rings, and the Details Panel lists them.
- Keep going until the folder you care about is in the centre. With the keyboard, select a row and press Enter.
- To go back up, choose the back arrow in the title bar, press Backspace or Alt+Left, or use the mouse's Back button. Each step returns to the folder you came from.
The breadcrumbs in the title bar show the path from Drives to the folder in focus. When the path is long, the middle folders collapse behind a Show more of the path button that lists them.
Reach an item without drilling
- To read the same result as a list, or to work with the keyboard, switch to Tree view.
- To jump to one item by name, size, kind, or age, find a specific item.
- Right-click a Segment on the map to add it straight to the Cleanup Basket without visiting its row.